Showing posts with label Gardening. Show all posts

Thursday, January 27, 2011

Project: back yard

Here is a drawing of my yard from above:

As you can see, its pretty big, and has a nice fence for the doggies. However, it drives me nuts that the landscaping looks like someone started to terrace and take care of the left side, but stopped years ago. Chaos has taken over! I really want to make it look like someone cares about it. The grassy part of the yard is good for the most part, but the far right side by the fence gets really boggy. Since we have moved in, we put in the bed to the left of the porch, planted the daylilies outside the fence by the road, and planted the redbud tree. I really like the forsythia and the holly, but there are FAR too many trees in general. I love that we have established, mature trees, but 11 is a bit much! Especially because most of them are oaks which make the soil very acidic and the yard very shady. I want to take down some of them, but Brett and I disagree about which ones and how many.

So to make a long story short, I am in the midst of planning out my dream yard. Does anyone have any suggestions? I want to keep a good bit of the grass, and make the rest of the yard look cared for and planned. The grassy part tends to get too wet, so any suggestions about what would suck up a lot of water on that side of the yard would be great!

Friday, June 4, 2010

How To: Garden Twig Trellis

Remember those peas? Did you peek underneath them to see what they were growing up? That's right, I made a trellis for them out of twigs that we found in the park and in our yard! This is all you need: sticks,

scissors, and twine!

The first step is to find several sturdy, larger sticks to be your vertical supports. My bed is 8 feet long and has 4 vertical sticks breaking it into 3 sections. You need one on each end and then a few in the middle. Those plants in the bed are lettuce--the peas were just seeds when I built this.
Once you pick those larger sticks out, then you want some medium sticks--not as big as the vertical supports, but also not bendy. I made them in 3 levels, slightly overlapping at each vertical support.


Here is a close-up of how I attached the sticks to one another. Just cut off a piece of twine about a foot long, then wrap it around one of the sticks a couple of times. Now criss-cross the strings over each other, and wrap it around the other sticks. Repeat that, then tie a square knot and cut off the extra. If you are really serious about your trellis lasting, you can use liquid nails and screws, because the twine will disintegrate after a few years in the weather.

Once you get your main three levels of horizontal supports, you get to start with you first diagonals. Now pull out sticks that are pretty long, and very flexible. I used green twigs from a recently-pruned crape myrtle, but I have also read about using willow.

Space the diagonals evenly, and weave them in and out of the horizontal supports. Alternate how they are woven as you go across (the first one front-back-front, the second one back-front-back). Then tie the diagonals to the horizontal and vertical supports as you go.

The last step is the second set of diagonals. If you did your first diagonals left-to-right, then this set should go right-to-left to form Xs and diamond shapes.

Again, weave them in and out alternating directions, and tie them to every other stick everywhere they naturally touch. They should be tight at this point, and you shouldn't need the twine to make them stay for a minute--so you can put them in temporarily, then step back to make sure you like the placement before you tie them on.

Here are a couple pictures of the finished product before the peas got their start:

I'm not gonna lie, my fingers hurt pretty badly by the time I was done because I tied so many knots!


And here are some pictures of the trellis covered in delicious peas! (Also the raised beds got a fresh coat of barn and fence paint in the meantime.) I wish I had take a few "during" shots so that you could see the vines as they climb.


The plants in front of the peas are (right to left) peppers, eggplant, and zucchini.


You can really see in this one how the little tendrils grip the trellis to pull the plant up.


You could make a trellis like this for any climbing plant, like clematis, roses, honeysuckles, or trumpet creeper. Does anyone else have a trellis they love? I would love to see pictures!

Monday, May 31, 2010

Give Peas a Chance!

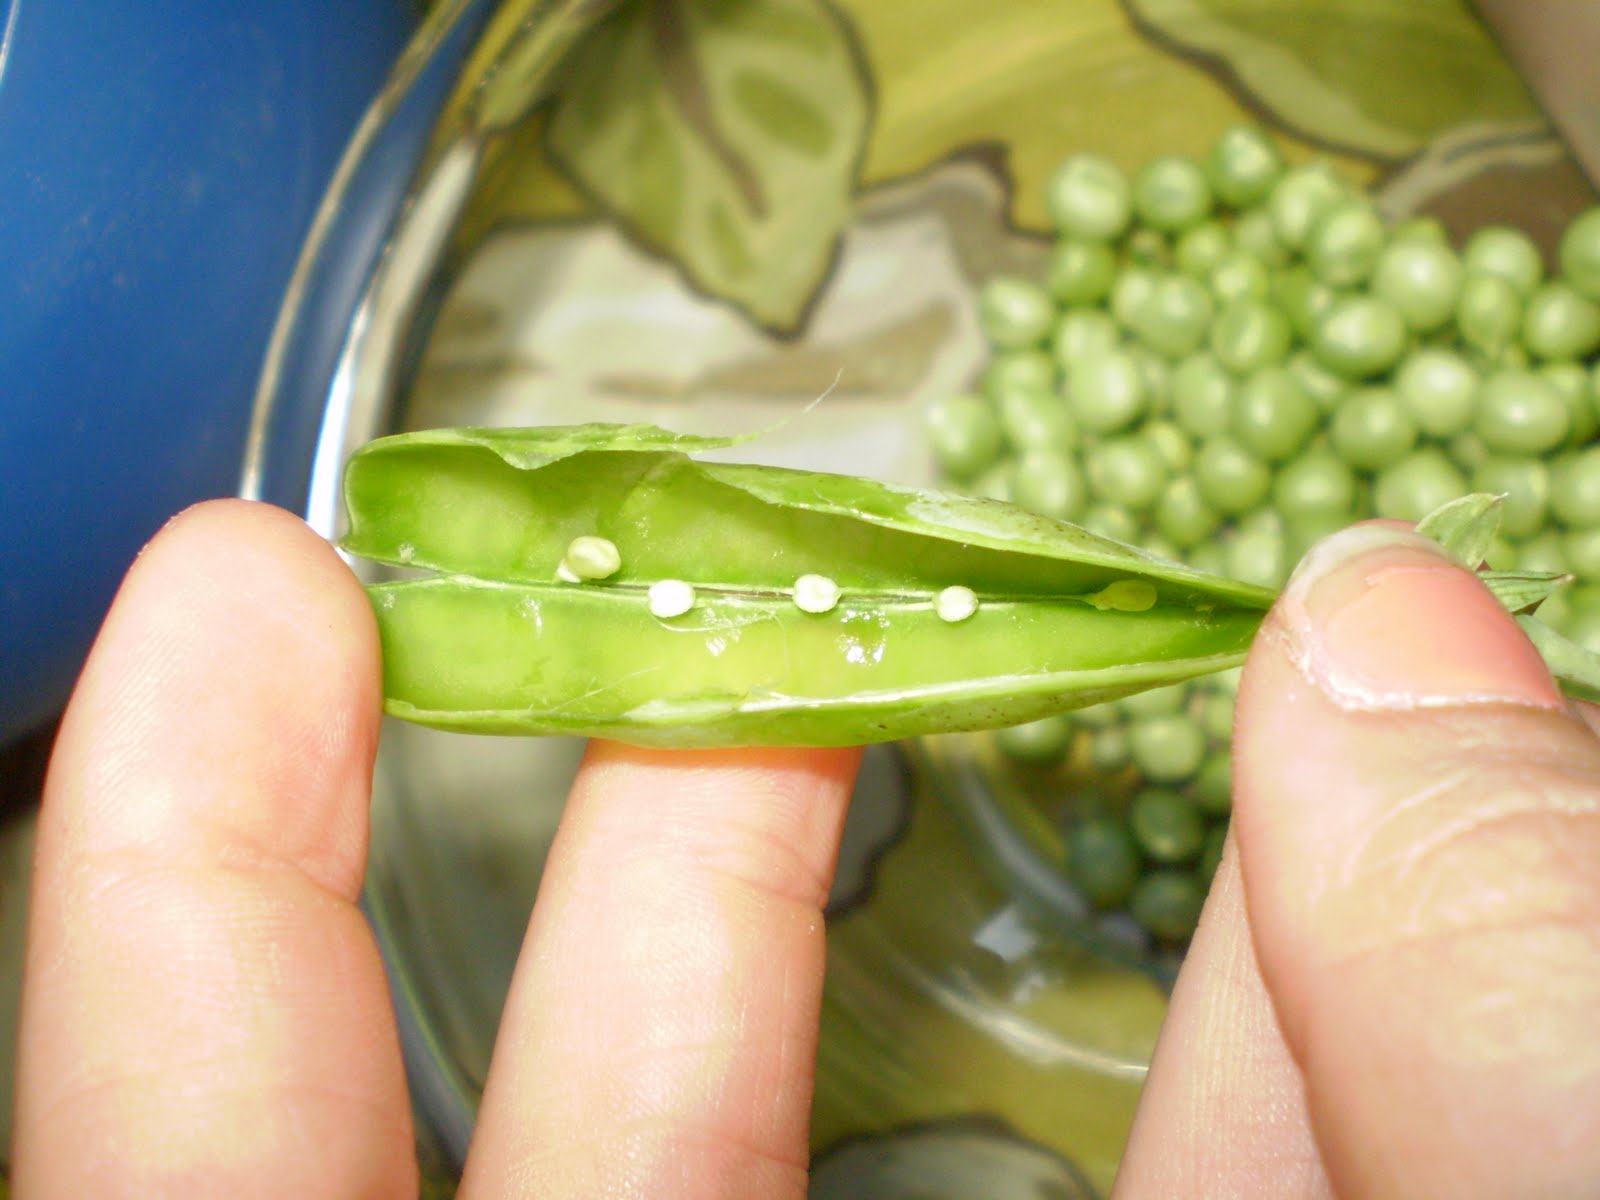
We grew peas in our garden this year, and we picked them and ate them last Saturday. Here they are in all of their plump glory hanging on the vine. Brett is totally crazy about fresh peas, so he was super excited.
And here is some pea shelling action for your viewing pleasure...

An aerial view of the whole system at work:


We steamed them and served them with grilled scallops and corn on the cob...mmm summer!

Thursday, October 15, 2009

Making Basil Pesto from Scratch

So I think I missed my calling as a basil farmer. Please see, me covered in basil, below:


Brett said, "Oh, while you aren't working, why don't you harvest some of our basil and freeze some pesto for us." WELL I DID!

Basil Pesto Recipe Ingredients:
2 cups fresh basil leaves, packed
1/2 cup grated Parmesan (or other hard italian cheese such as asiago)
1/2 cup extra virgin olive oil
1 minced garlic clove
salt and pepper to taste (1/2 tsp of each)
*toasted pine nuts--I don't add these in if I am freezing the pesto, only if eating right away*

Instructions:
1. Pulse basil leaves in food processor until minced
2. Add olive oil and pulse until well-mixed
3. Add cheese, garlic, and salt and pepper.
4. Run food processor until very well mixed and texture is like a loose paste
5. If eating immediately, toast pine nuts until golden brown and mix into paste by hand. If freezing, leave this step until you are going to eat the pesto
6. If freezing, spoon pesto into ice cube trays or mini muffin tins and freeze.
7. Once frozen, remove from small containers into large freezer safe bags for ease of storage
8. When ready to thaw, remove desired amount from freezer and sit near a hot burner or on the oven while it heats.


I know its mid-October, but no one told our basil plants--they are still going strong, and--no joke--were taller than me before I took my scissors to them!

Above are the ingredients you need to make your own pesto: olive oil, garlic, Parmesan cheese, salt and pepper, and most importantly basil leaves! ALSO, not necessarily an ingredient but just as important is a food processor. Unless you have totally badass knife skills, infinite patience, and a few days to chop.

This is a picture of the basil leaves I took off of the plants I collected in the first photograph. I spent HOURS pulling the leaves off those suckers, and the stems and flowers made their way to the compost pile.

Load some leaves into the food processor, PUT THE LID ON,


And hit the pulse button as many times as necessary to get the leaves chopped up into small pieces like in the photo below, then add the olive oil.
Below is a photo of the cheese added to the mixture of basil and oil.


I went a little overboard and made about THREE QUARTS of pesto--but I didn't want all that beautiful basil to go to waste. And like my mom says, "you will really love the summery smell of the fresh basil when its a dark and blustery winter night." well put!

I had some assistance from Brett when he came home from work, scooping the pesto into my mini muffin tins for freezing.

Finally, here is a photo of the pesto incorporated into pasta and fresh vegetables:

Bon Appetit!

It is also delicious on slices of french bread as part of a bruschetta, on a white pizza with mozerella and toppings, and mixed into cream cheese as a spread. Does anyone have any really great creative uses for pesto?? Please share!

Monday, October 5, 2009

How Does My Garden Grow?

When we moved into our house in February, there were three really big evergreen bushes just next to the side entrance of our house. We wanted to cut them down because someone could easily hide in them at night and surprise us, and also because they were too close to the foundation.
Here is the house "after." The only problem once we cut them down was that we had three ugly stumps, and were too cheap to pay someone to dig them out. So we decided to put in raised beds to let the stumps soften up for a couple of years so we could pull them out.


We made two raised beds that are 8'x 4', spaced a few feet apart for us to walk through. To make two, we bought:


~three 12" x 12' boards, cut into four 8-foot pieces and four 4-foot pieces

~one 4"x4"x 8' board, cut into 8 one-foot sections

~a pack of at least 16 wooden stakes (can be found at Home Depot by the silver bullets)

~32 badass 3" stainless wood screws

~64 slightly less badass 3" stainless wood screws


*Disclaimer: This drawing was made in PAINT, yes paint. Therefore it looks like it was drawn by a three-year-old. Paint automatically does this to even the most experienced drafter, so please bear with me!*


Here is a diagram of how to make one:


You could also use this same plan to make a sandbox. (TIP: some online plans say to use carriage bolts--don't do it! The average person's drill won't go all the way through a 4x4, and let me tell you from experience, this is WAY more trouble than it's worth. Just use stainless screws.)


If you are replicating this project, make sure that your lumber is NOT treated, because you don't want nasty chemicals leaching into your garden to be absorbed by the veggies. You can use cedar or redwood (best for the environment but also the most expensive), or you can use regular pine and paint it or seal it (not great for the environment but better than treated lumber and not as expensive as hardwood).
This is a picture of the garden in May:


You can see above how we laid out our baby plants. We did this in May, and learned a LOT about gardening in the process! In the bed pictured here, we laid it out as follows:

Here is a picture of the garden in July. Perfect, right? The cucumbers are climbing up the picket fence, and everything is going juuuust peachy keen! The second raised bed has a forest of basil planted in it, along with some wildflowers.
First came the cucumbers--we got somewhere between one and two dozen cucumbers before something bad happened to the plants and they rotted. Ok, so cucmbers were gone by late July.
Next, the tomatoes went CRAZY and started growing like nobody's business. They stole all the light from the zuchinni, so we only got one little veggie before they all kicked the bucket!
So then in August we started getting yummy bell peppers and lots and lots of tomatoes. The romas were kind of mealy, but the grape tomatoes were AMAZING!

And now, for the picture of the garden in October.

BAM!

Wtf man? I am kind of afraid its going to take over the world, Pinky... Yeah, that enormous jungle right there is 4 tomatoe plants!

So the next question is...how do you end a garden?

Next year we will definitely space the plants out more, and maybe plant less of each type.

Does anyone else have stories from the garden this year? Any adventures or misadventures you would care to share?

Tuesday, August 18, 2009

Friday, August 14, 2009

Appetizers on the Back Porch

Mmmmmm so juicy!! These went straight from our little vines to the table.


Louise, thank you for introducing me to Boursin! And those little mini toast squares were demolished quicker than you can say "spinach artichoke dip."


I love summer. I can't even express how much!

Tuesday, August 11, 2009

Our Hibiscus, Hibby, BLOOMED!!!!


This is hibiscus tree that Brett adopted from a college roommate who couldn't keep it anymore. That means it's at least 6 years old, probably older. The problem is that it never blooms! Until now!

I know for a fact that it lost all of its leaves in 2007, and was left nothing but a stick trunk and a bunch of twiggy branches.

Then we moved to Norfolk and I convinced Brett to let me at it with the scissors and Hibby lost about 2/3 of her woody growth. In 2008 there was one bloom (!) but we missed it because we were out of town for Easter.


But it turns out that she loves our backyard!

(Those are my begonias underneath--I <3>

Has anyone else had a case of a finicky hibiscus? My mom keeps hers in the steamy, warm, and bright master bathroom where they bloom up a storm. Any advice on how to keep her in blooms?